 FastLight Production Instructions FastLight Production Instructions  |
| Step 1: Typeset - Run your typesetting, graphics, or image program. (Tip: Microsoft Word is good enough to create a beautiful stamp!) Load the stamp text and/or image and place inside a pre-sized Frame (available on our FastLight Homepage, under Typesetting Downloads ). Delete the stamp border, or resize/redraw the border if you are specifically creating a bordered stamp. |
 |
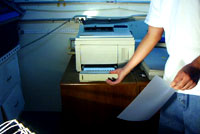
| Step 2: Print, Staple - Place the Vellum Film into your Laser Printer and print directly onto the Vellum Film. Once printed, place a Clear Plastic Sheet over the Printed Vellum to protect the print copy. Do this by simply stapling the Vellum Film to the Clear Plastic Sheet. |
 |
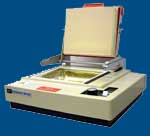
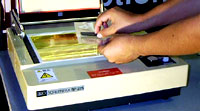
| Step 3: Place - Place the printed, stapled sheet set onto the glass plate of the FastLight machine. Put the Foam Die squarely into the Frame, face-down. Place the small or large Platform on top of the Glass. Use the smaller platform for one or a few stamps, and the larger one for a larger job. |
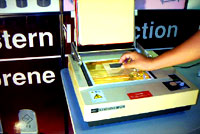 |
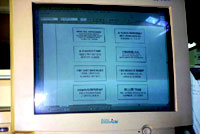
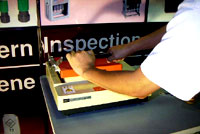
Step 4: Flash - Make sure the switch is set to "Non-PPC." Press the Machine Handle down to touch the Platform. Repeat Flashes as per instructions below:
.....Small Fixture: 1 or 2 stamps = 1 flash
3 to 4 stamps = 2 flashes
.....Large Fixture: 1 to 3 stamps = 2 flashes
4 to 8 stamps = 3 flashes
|
 |
| Step 5: Separate - Carefully peel the Foam from the plastic film and put aside, preferably onto a clean sheet of paper. |
 |
| Step 6: Prepare - Place Stamp Mount, Ink Cartridge, Exposed Foam and Retainer Ring and Label on Table for fast and easy Assembly. Tweezers and scissors will help speed the assembly process. |
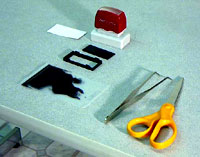 |
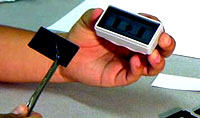
| Step 7: Pre-Assembly - Use scissors to cut open the inked cartridge bag. Remove the inked Ink Cartridge(s) from the plastic bag by using the Tweezers, since it is coated with fresh ink. |
 |
| Step 8: Install Inkpad - Hold the FastLight Stamp mount Face-up. Use the Tweezers to put the inked Ink Cartridge into the Mount. |
 |
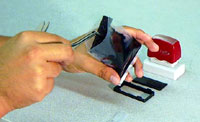
| Step 9: Install Foam - Place the exposed Foam into the Mount, on top of the Ink pad, face-up. Do not use tweezers to grasp the foam material, as this may harm the impression. |
 |
| Step 10: Install Retainer - Place the Retainer Ring squarely into the Die-Frame. Drop it in "legs" first so that it loosely encloses the freshly printed foam. You will snap it tight in just a second... |
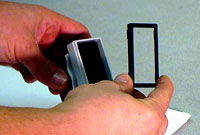 |
| Step 11: Cap the Unit - Important! Place the Stamp Dust Cover on the Stamp. The cap is designed to facilitate the assembly process, and is required to snap the unit together. |
|
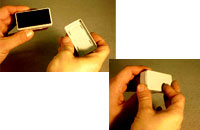
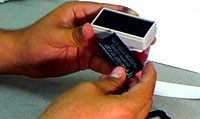
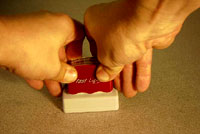
| Step 12: Snap Together - With the stamp cover in place, press the Stamp down with firm pressure until you feel it snap together. This will lock the Retainer Ring permanently into place. |
 |
| Step 13: Wait - Allow the stamp to rest in its normal upright position for 10 to 15 Minutes (depending on the stamp size), or until a complete stamp impression can be achieved. |
 |
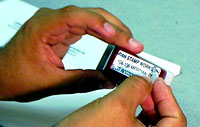
Step 14: Test & Label - Use the newly assembled stamp to make its own label. This will test the product's impression, and give you a final chance to proof read the copy and/or check the image for correctness. Place the stamped label on top of the handle, and snap on the clear Plastic Cover.
Optionally, you can laser-print a new label onto your choice of paper and cut-to-size to use instead of the stamp's own impression. |
 |
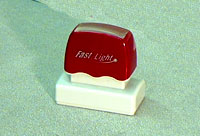
That's it. The Stamp is now complete and ready to ship.
|
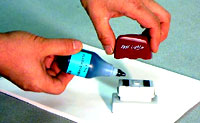
...To Re-Ink... Simply pull off the Stamp Handle and re-ink from Rear. Place a few ink drops into each of the two Ink Stations, making sure not to overflow. The exact quantity of ink depends on the size of the mount. Re-ink with FastLight Ink only. Other inks may harm the stamp or effect the print quality.
Note: This is not required immediately after assembly, and is not part of the assembly process.
|
 |
|
 Home - Size Chart - Faq - Info Home - Size Chart - Faq - Info
Shop: Machines - Pre-Ink Mounts - Components - Inks
Videos: Video Home - #1:Intro - #2:Demo - #3: Full Instructions - #4: Benefits - Help
|